


A leaking roof is more than just a nuisance – it’s an absolute nightmare! It can lead to extensive damage, from saturated attic insulation to destroyed floors. To safeguard your home, repairing the leaky roof should be at the top of your priority list.
Repairing a leaky roof is no walk in the park, but if you have the ambition and courage to tackle it yourself, this process can be relatively affordable while helping maintain your home’s value.
When to Repair a Roof Leak
Although roofing companies can take care of your house’s roof at almost any time throughout the year due to their skilled labor and experience, if you want to fix it yourself, take on the project during the warmest and driest season. This means anywhere from late spring up until mid- or even late summer! Make sure that you check the weather forecast before beginning work as some roofs may have sections exposed for a day or two. To be safe, try fixing your leaky rooftop between May through October in most areas.
Safety Considerations
Repairing a leaking roof can be dangerous, but with the right safety measures and working practices, you can complete the job safely. Be sure to bring along an assistant while repairing your roof – two heads are better than one! Additionally, never attempt this type of project if it is wet or slippery outside – falls from heights are among the most common causes of accidents in these types of projects. To ensure further safety when up on the roof, wear shoes with soft soles and make sure to remove any obstructions such as twigs, pine cones, leaves or moss that may cause you to trip.
To protect yourself from a fall while sealing your leaking roof, consider using a Personal Fall Arrest System (PFAS) to slow and stop any potential falls off the side of the house. Alternatively, you may use a fixed Fall Restraint System so as to prevent yourself from reaching an unprotected edge of your roof. Additionally, make sure to read through OSHA’s comprehensive publication on “Protecting Roof Workers” for additional safety information that can potentially keep you safe at all times. Don’t forget other basic personal protective items such as hearing and eye protection, gloves and even masks!
Tools
To complete your project, you should arm yourself with a flat pry bar, hammer, hook blade shingle cutter, utility knife, ladder and flashlight. Additionally make sure to equip yourself with a caulking gun for secure seals as well as essential tools such as chalk line , circular saw , tape measure , pencil and personal protection devices .
Materials
To properly replace or fix your roof, you’ll need three-tab composite shingles, roofing paper and/or synthetic underlayment to create a protective barrier against the elements, nails that are specifically designed for roofs (such as 8d common nails), exterior sealant for additional defense from moisture and weather damage, a new vent if replacing an existing one due to damages, plus 7/16-inch thick plywood or OSB boards in order to repair any damaged sections of the deck.
Instructions
1. Locate the Roof Leak
Begin your investigation of the roof leak at its most visible sign: a ceiling stain. Climb up a ladder, equipped with flashlight in hand, and take to the attic. Follow this vertical line upward until you reach the highest point on the roofline – close to where it meets with the ridge. You may notice discoloration such as black or white staining along bottom of roof deck; or even mold & mildew growth that could indicate moisture build-up from water leakage.
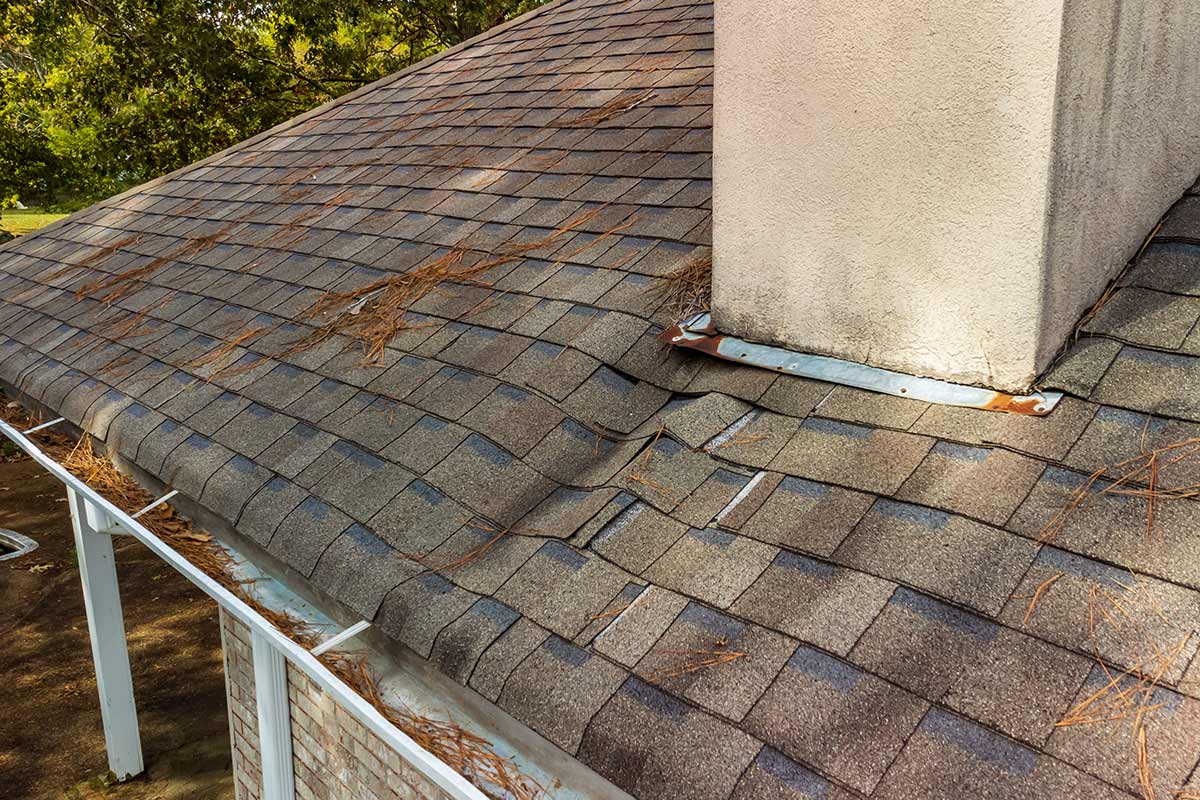
Roof vents can be a major cause of roof leaks, ranging from attic fans and turbines to plumbing soil stack pipes or any element with metal flashing that goes beyond the rooftop. Damaged plywood roof decking (also known as sheathing) is another potential culprit for water infiltration.
2. Examine Roof Vents
If the source of your leak is roof vents, you must investigate it carefully. Climb back up to inspect both the housings or boots for cracks and make sure that all vent components are securely fastened with nails. Ensure that everything remains in place and no pieces have come loose from their original positions.
3. Remove Damaged Roof Vent
Start the repair process by removing the compromised roof vent from atop your house. With a pry bar, pull out nails that attach shingles to the vent and then peel back those shingles tucked underneath; it may be useful to have an assistant on hand for extra leverage. Once done, take away all of the nails attaching this fixture to your roof deck before finally taking off the unit itself. It is important not to remove any of these tiles while completing this step!
4. Replace Roof Vent
Generously apply a thick layer of roofing cement or sealant on the base of the vent’s flashing. Ask your assistant to carefully pull back and separate any shingles that may be hindering you from firmly inserting the vent. The lower section should overlap the shingle edges in order to avoid any potential water seepage. Securely affix nails at each corner and every 4 inches, topping off with additional sealant for added protection against leaks.
5. Tear Off Old Roofing Shingles
To gain access to the damaged section of your roof deck, you’ll need to remove shingles. Begin above the repair point about two rows of shingles up and slide a pry bar under them from bottom going upwards (towards the ridge). Once all nails are loosened, give each row downwards pull until they come off one by one. With these steps, you can easily reach your required spot for repairs!
6. Remove the Old Roofing Paper
To ensure a safe and secure installation of shingles, you need to install roofing paper or synthetic underlayment between the deck surface and the shingle. To do so, delicately slice off strips of said material with your utility knife – ensuring that as much remains intact as possible for optimal protection.
7. Mark the Deck Cut Area
To ensure the new roof deck is centered, use a chalk line to mark both sides of each rafter in the damaged area. For accuracy, follow the existing nails as your guide. Then draw an intersecting horizontal line above and below that section for further alignment guidance.
8. Cut Away Damaged Roof Deck
To ensure accurate cuts, adjust your circular saw blade to a depth of 1/16-inch more than the thickness of the roof deck. When tracing along the guidelines with chalked lines, it is important that you remain outside of the demarcated section for safety’s sake. This will successfully remove any damaged sections from the roof deck.
9. Remove Roof Deck
With the pry bar, carefully remove any nails from the section of roof deck that you have cut out. Following this, use your tool again to lever off any damaged plywood but do not discard it just yet.
10. Cut New Roof Deck Patch
To ensure safety, use the damaged roof deck section as a guide for tracing and cutting out the measurements of your new patch. For added precaution, cut it on solid ground instead of atop the roof.
11. Attach the Roof Deck Patch
Securely attach the roof deck patch on top of your rafters using 8d common nails for a strong and reliable hold.
12. Lay Paper or Underlayment
Starting from the bottom, affix roofing paper or underlayment to your roof by hammering in roofing nails. Overlap each row at least four inches for a secure seal.
13. Run the First Row of Shingles
Begin the installation at the bottom row of shingles and fit each new shingle into existing rows, from left to right. Secure them with a small bead of roofing cement along their base and nail down through top edges.
14. Complete the Shingles
As you work your way up, ensure that the top row of shingles is properly meshed. To do this, slide the new shingles underneath the existing ones to make a secure connection.