


When connected to an electrical source, heat cable is designed to warm up and efficiently dissolve any snow melting at the edges of a roofline or gutters. This prevents ice dams from forming and water back-up under shingles; instead, allowing it simply drip down to the ground. To install this type of protective equipment, loop its zigzag pattern along your desired area for maximum efficacy!
To get your job done safely and efficiently, make sure you have the following items in hand: An extension ladder, a tape measure, UL-listed heat cable with roof clips. Having these tools readily available will ensure that all of your tasks are completed quickly and correctly!
1- Measure for Cable
Before you begin installing your heat cable, it’s crucial to determine how much of the cable is needed. This involves a few simple steps and calculations. Firstly, measure the length of your roofline from end-to-end. Then take note of the depth by measuring from the edge of your roof (not gutter) back to its outside wall. With these measurements in hand, you can calculate precisely how much Heat Cable is ideal for successful installation!\
To determine the amount of rainwater your roof can capture, use the following formula: If your eave overhang is 12 inches deep, multiply its total length by 4; if between 12 and 24 inches deep, multiply it by 5.3; or for a depth ranging from 24 to 36 inches, multiple it by 6.8.
Incorporate the length of every downspout into your total calculation. If a downspout is not at the end point of a cable, double its measurement as it must travel all the way to the bottom and back up within that same downspout.
To conclude, calculate the distance from the eave of your roof to where you will plug in your heat cable. Add together all these measurements and that is how much wire length you should acquire.
2- Begin Routing Cable
To ensure that the cable is fully secured, start routing it from the electrical outlet up to a shingle on the roof slightly higher than your exterior wall. Securely clip it to this shingle so that its installation completely covers any overhangs in your roofline. Ensure the cable remains firmly attached to the shingle by using one of the supplied clips.
Tip
For optimal installation, it’s best to attach clips on warm and malleable shingles during a dry, mild day with no wind. Trying to install roof heat cables when snow has already set in is never recommended.
3- Create the First Loop
Guide the cable back to the gutter at an angle, and loop it up. Use one of the supplied eave clips and attach it beneath the last shingle—enabling a part of the cable to slide into your gutter.
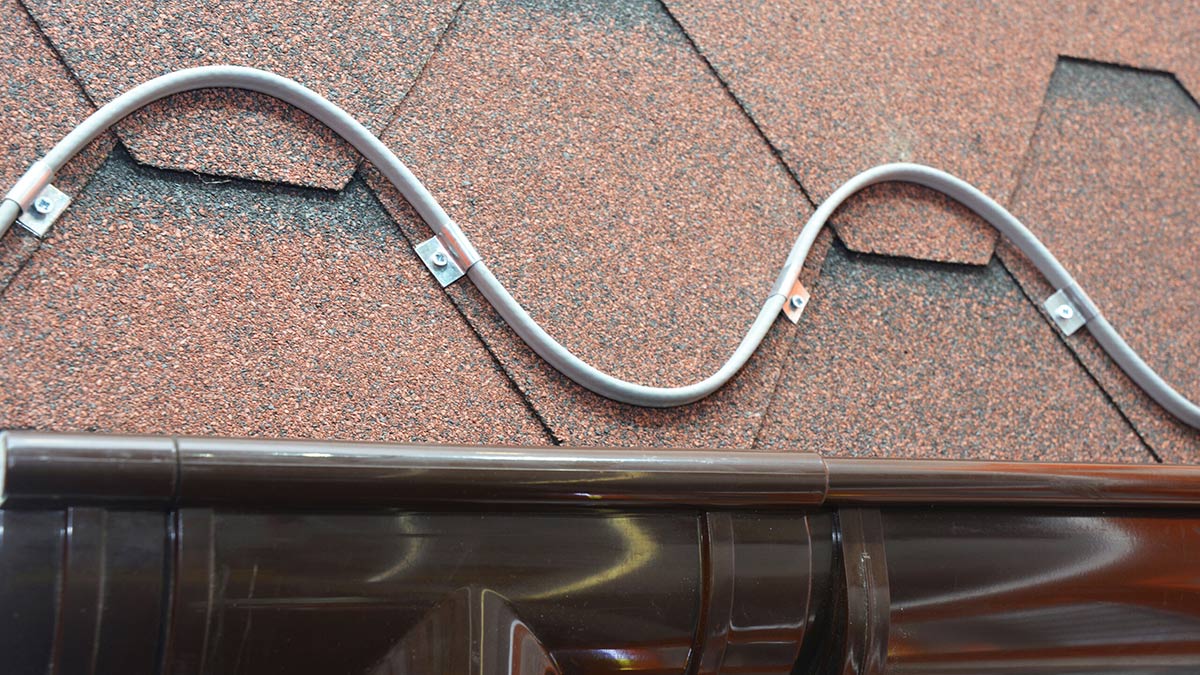
4- Continue the Zig-Zag
To maximize the coverage of your cable, run it up the roof in a zig-zag fashion to form 15 inch wide triangles. Then affix each apex with a shingle clip for stability and durability. To secure the entire circumference of the rooftop, replicate this zig-zag layout as many times necessary.
5- Run Cable Through Gutters and Downspouts
Upon concluding the roofline, you can then start to put heat cable in the gutter. You can attach the cable at either end of your gutter – along its base or with hangers and S-hooks that are fitted into looping sections of heating cable.
When you reach the downspouts, feed the cable into it in a loop-like fashion, pushing it as far down as possible.
Move the gutter cable back to its origin point, and then carefully slip the end of it through the final downspout until it reaches its outlet.
To ensure your heat cable is working properly, plug it into the GFCI outlet and then disconnect it until there’s snow. This will preserve energy since you don’t need to run the cable when there isn’t any ice or snow on the roof. Once everything is set up correctly, rest assured that your roof will be taken care of!
When to Call a Professional
For those who feel anxious about heights, the prospect of working on an extension ladder in high homes with tall roofs can be intimidating. Fortunately, you don’t have to take this risk – a roofing specialist or skilled handyman is readily available and will install heat cables at a price that fits your budget. Additionally, if you already have new gutters or new roofing installed, it’s best practice to consider professional heat cable installation for extra safety measures.